DICOM Basics using Java - Orthanc DICOM Server for Testing
Introduction
This is the next installment in my series of articles on the DICOM standard in which I want to introduce you to a charming little DICOM server called Orthanc that is powerful enough and production-ready and yet is simple enough to use in the subsequent articles in this series. In this tutorial, we will learn to quickly install and configure Orthanc server and then quickly perform a DICOM echo/verification using PixelMed toolkit as well as a standalone DICOM command line testing tool to verify basic connectivity. In the subsequent tutorials, I will cover DICOM network-related operations such as C-Find, C-Move, C-Store, etc by using this server and hopefully illustrate what happens during many communication-related operations using the DICOM standard. Let's go!
Quick Introduction to PACS and Orthanc Capabilities
When building DICOM applications, one actor that will almost always be present in the overall workflow is a PACS system. PACS stands for Picture Archival and Communication System. A PACS system typically comprises of several sub-components namely imaging machines(called 'modalities' in DICOM) where images may be generated , a mechanism for distribution and exchange of these images securely, facilities in the form of workstations and other mobile devices to enable viewing, processing and interpretation of these images as well as a mechanism for storage and retrieval of these images (as well as related documentation and reports) in the form of digital archives. PACS systems come in all shapes and sizes consisting of one or more of these components and vary in cost and complexity. For our tutorial series, my goal is to illustrate many DICOM-related network operations using one such PACS system namely, Orthanc DICOM Server.
“Simple is hard. Easy is harder. Invisible is hardest.” ~ Jean-Louis Gassée
Orthanc is a production-ready DICOM server was built using a popular DICOM toolkit/library called DCMTK which has been around for a long time. Orthanc seems to have been primarily developed at the Department of Medical Physics the University Hospital of Liège in Belgium by Sébastien Jodogne. The source code for this server is copyrighted under the GPLv3 license. Orthanc DICOM server is very popular and has been deployed in numerous research as well as commercial situations around the world. It can be installed on any computer (supports Windows, Linux and OS X at the time of this writing) and can be considered a "mini-PACS" in terms of its feature set and has been designed to be lightweight and standalone and requires very little administrative overhead. Besides being easy to install and configure, Orthanc also provides a simple web user interface and supports various DICOM services such as C-Move, C-Store and C-Find SCU. It also supports a REST API to enable integration of DICOM data within non-DICOM applications.
Installing Orthanc Server
Installing Orthanc is very easy. It took me only two minutes to install and configure the application to be able to talk to small Java client that I wrote. The installers for the various operating systems that are supported can be found here. The steps to download and configure the Orthanc server on the Windows operating system are specifically described at this location. The instructions for install and configuration on other operating systems vary and so always refer to the latest documentation on their website. Also, please read the information provided in the FAQ section, or contact their support team directly for any questions. Once you have completed the install and configuration steps, you should be able to use the web interface (called Orthanc Explorer) and follow along with the rest of this tutorial.
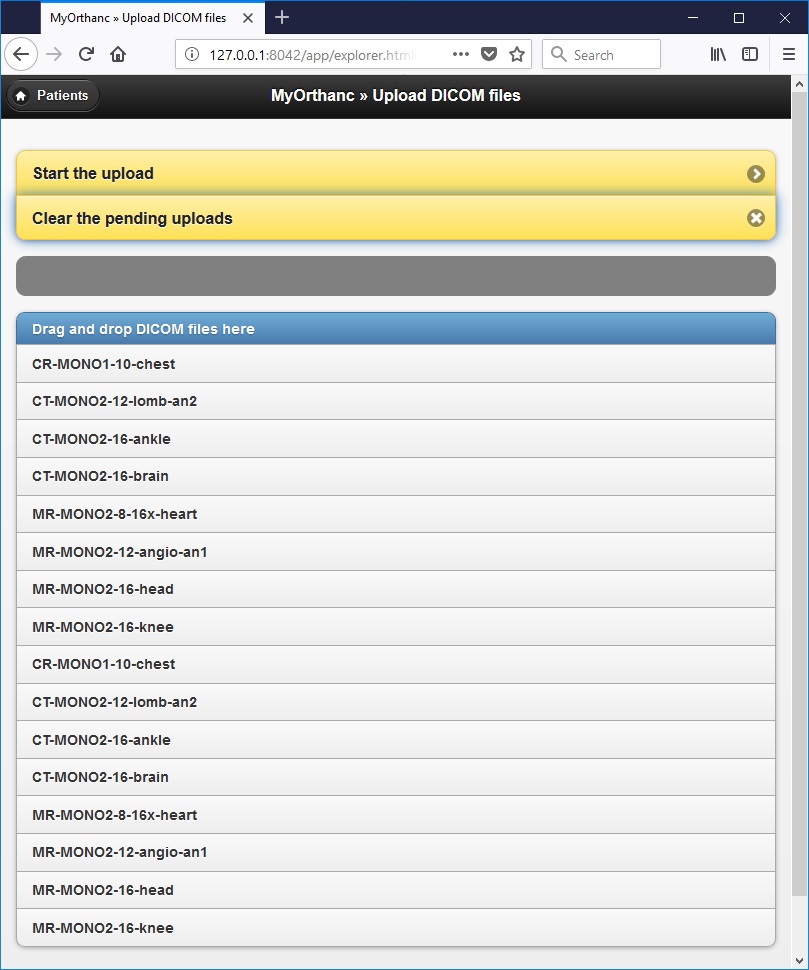
Once the Orthanc server set up has been successfully completed on your machine, you may wish to upload some sample DICOM images into it to enable you to get a quick feel for its user interface and its features. Please seen screenshot below showing me uploading a set of sample DICOM images into Orthanc using the "Upload" screen. Command line upload is also available. In real-life, you will most likely pull images from a remote destination such as a modality or another PACS system into Orthanc Server instead of performing a manual upload. However, that is beyond the scope of this quick overview of its features.
Some Notes on Orthanc Configuration
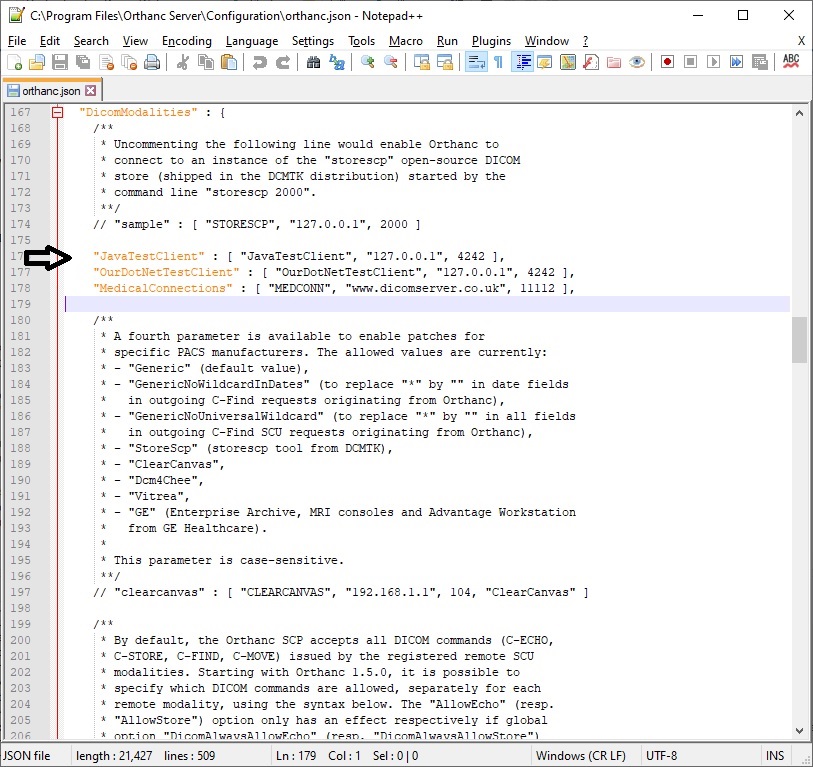
Orthanc Server enables you to control many aspects of its behavior using a special JSON formatted configuration file that is found under the "configuration" folder where the application is installed. There are sensible defaults for most settings and you don't need to change any of them for playing around initially. However, the DicomModalities setting is something you would need to change when you are setting up connections with other DICOM service providers during testing. See screenshot below of my configuration file on my local machine showing how this setting is utilized. Firewalls are another thing to consider in the overall scheme of things as DICOM traffic is not through HTTP typically and so, DICOM-related ports (inbound and outbound) have to enabled as well. You can also use the log files as well as use the verbose/trace options when running Orthanc Server to see more details when it is running, and you need to troubleshoot issues. Please see their FAQ section for more details.
The PixelMed Java DICOM Toolkit - Quick Overview
For the purposes of illustrating a basic echo verification (called 'C-ECHO' in DICOM) with this server as part of the initial set up, I will be using a freely available and powerful DICOM toolkit called PixelMed Java DICOM Toolkit. This is a completely stand-alone DICOM toolkit that provides functionality for DICOM file and directory processing, image viewing as well as DICOM networking-related operations. This toolkit is completely free for both commercial or non-profit use. It is well documented and also has a small discussion forum and mailing list for users. The list of features contained within this toolkit is quite comprehensive. Please keep in mind that the use of this toolkit in my tutorial does not in anyway imply my official endorsement of it for implementing a production application. Every situation is unique, and only you are ultimately in the best position to decide that. This article is also not meant to be a tutorial on this toolkit, and my focus here is simply to tie DICOM theory to what a practical (although simple) implementation might look like. So, if your goal is to learn how to use the PixelMed library, I would encourage you to visit its website or check out the discussion forum or StackOverflow discussion pages for any assistance.
Other Setup Required…
- Download and install the Eclipse Java IDE from here (or use any other IDE you prefer)
- Download the PixelMed toolkit library from here
- Ensure that the PixelMed.jar library is included in your Java project’s class path (some examples may require additonal runtime dependencies such as JAI Image IO Tools that can be found on PixelMed software download. Look for a tar compressed file called pixelmedjavadicom_dependencyrelease.YYYYMMDD.tar.bz2 or something similar)
- You can find the source code and images used in this tutorial on GitHub
- You can download more DICOM images from this site if you want as well
- You must set up a DICOM remote peer (a "Verification SCP") to try out this example. I provide some information below but I will leave you to read the product documentation yourself to configure this yourself as they are pretty straight forward in most DICOM software.
Testing Connectivity using PixelMed Toolkit
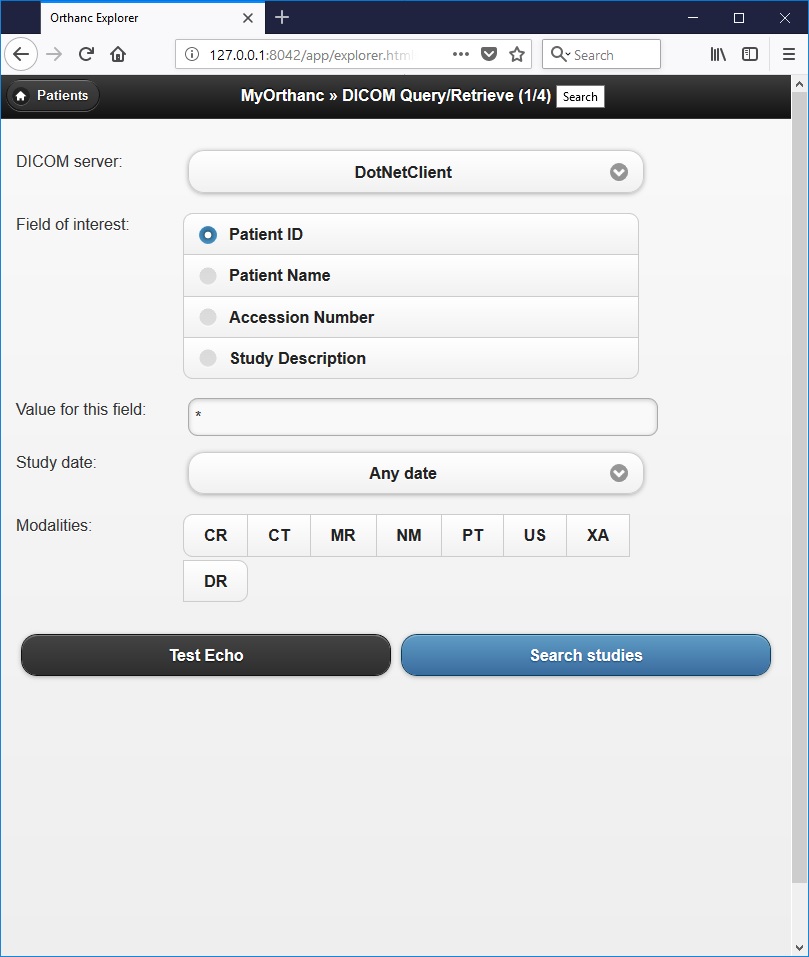
We are going to use the same DICOM verification client we developed in the earlier tutorial on DICOM C-Echo verification. This is one of the first steps undertaken in the discovery protocol before any other DICOM-related information exchanges are undertaken between the communicating devices. Please note that in DICOM both devices need to have their peer information registered on each other's system before any communication is typically allowed ("old school security"). This also happens to be one of the frequent issues that arises when setting up DICOM connectivity between two devices. The code illustration shows the PixelMed Java client communicating with an Orthanc DICOM server that is running locally on my machine. See my earlier DICOM tutorials for setting up a devevlopment environment to work with PixelMed. The results of the connection are shown in the screenhot below.
    package com.saravanansubramanian.dicom.pixelmedtutorial;

    import com.pixelmed.network.VerificationSOPClassSCU;

    public class DicomVerificationServiceDemoUsingLocalOrthancServer {

        public static void main(String[] args) {
            try {
                //Demonstration of code to verify connectivity against local Orthanc DICOM server

                String remoteEntityHostName = "localhost"; //their hostname or IP address
                int remoteEntityPort = 4242; //the port their entity is listening on
                String calledAETitle = "ORTHANC"; //their Application Entity Title
                String callingAETitle = "JavaTestClient"; //our Application Entity Title
                boolean secureTransport = false; //optional - we wont need to use it for our example
                int debugLevel = 2; // zero for no debugging messages, higher values for more verbose messages

                //Call the constructor for this class passing the various arguments whose values are listed above
                new VerificationSOPClassSCU(remoteEntityHostName,remoteEntityPort, calledAETitle, callingAETitle, secureTransport,debugLevel);

                //See documentation at: http://www.dclunie.com/pixelmed/software/javadoc/index.html
                //on the class VerificationSOPClassSCU
                //For successful connection, association negotiation and C-ECHO command success status
                //is indicated by the lack of an exception.
            }
            catch (Exception e) {

                //the following exceptions may be thrown if C-ECHO fails:
                //1. java.io.IOException
                //2. DicomException
                //3. DicomNetworkException - if the connection is refused, the association reqeust is reject,
                //or the C-ECHO command reports other than a success status

                e.printStackTrace(); //in real life, do something about this exception
            }
        }

    }
Other Tools for Connectivity Tests
When you need to troubleshoot echo verification operations in DICOM, it will helpful to use one of the many useful DICOM testing tools out there. The one that I have used in the past and have liked is DCMTK. The toolkit comes with many standalone testing utilities that help you test various aspects of DICOM through a command line interface. The echoscu command is the one that will be very useful in our situation as we want to verify if our installed Orthanc application responds to DICOM "ping requests" from other DICOM-enabled applications. This command implements the Service Class User (SCU) functionality for the Verification SOP Class. It helps send a DICOM C-ECHO message to the Orthanc DICOM server which is the Service Class Provider (SCP) for the Verification SOP class in this case and waits for a response. The command takes two parameters namely hostname of the device you are connecting to and the tcp/ip port number that you are communicating through. The full console output of the command line operation performed on my machine is shown below for reference. If you see any issues with this on Windows, then try launching Orthanc manually instead of running it as a Windows service and repeat the same steps. Here, I am running the command with "debug" mode and verifying connectivity against the Orthanc Server running locally on port 104.
C:\SaravananDicomTestingTools\dcmtk-3.6.5-win64-dynamic\bin>echoscu.exe -d localhost 104
D: $dcmtk: echoscu v3.6.5 2019-10-28 $
D:
D: Request Parameters:
D: ====================== BEGIN A-ASSOCIATE-RQ =====================
D: Our Implementation Class UID:      1.2.276.0.7230010.3.0.3.6.5
D: Our Implementation Version Name:   OFFIS_DCMTK_365
D: Their Implementation Class UID:
D: Their Implementation Version Name:
D: Application Context Name:    1.2.840.10008.3.1.1.1
D: Calling Application Name:    ECHOSCU
D: Called Application Name:     ANY-SCP
D: Responding Application Name: ANY-SCP
D: Our Max PDU Receive Size:    16384
D: Their Max PDU Receive Size:  0
D: Presentation Contexts:
D:   Context ID:        1 (Proposed)
D:     Abstract Syntax: =VerificationSOPClass
D:     Proposed SCP/SCU Role: Default
D:     Proposed Transfer Syntax(es):
D:       =LittleEndianImplicit
D: Requested Extended Negotiation: none
D: Accepted Extended Negotiation:  none
D: Requested User Identity Negotiation: none
D: User Identity Negotiation Response:  none
D: ======================= END A-ASSOCIATE-RQ ======================
I: Requesting Association
D: setting network send timeout to 60 seconds
D: setting network receive timeout to 60 seconds
D: Constructing Associate RQ PDU
D: PDU Type: Associate Accept, PDU Length: 184 + 6 bytes PDU header
D:   02  00  00  00  00  b8  00  01  00  00  41  4e  59  2d  53  43
D:   50  20  20  20  20  20  20  20  20  20  45  43  48  4f  53  43
D:   55  20  20  20  20  20  20  20  20  20  00  00  00  00  00  00
D:   00  00  00  00  00  00  00  00  00  00  00  00  00  00  00  00
D:   00  00  00  00  00  00  00  00  00  00  10  00  00  15  31  2e
D:   32  2e  38  34  30  2e  31  30  30  30  38  2e  33  2e  31  2e
D:   31  2e  31  21  00  00  19  01  00  00  00  40  00  00  11  31
D:   2e  32  2e  38  34  30  2e  31  30  30  30  38  2e  31  2e  32
D:   50  00  00  3a  51  00  00  04  00  00  40  00  52  00  00  1b
D:   31  2e  32  2e  32  37  36  2e  30  2e  37  32  33  30  30  31
D:   30  2e  33  2e  30  2e  33  2e  36  2e  34  55  00  00  0f  4f
D:   46  46  49  53  5f  44  43  4d  54  4b  5f  33  36  34
D: Parsing an A-ASSOCIATE PDU
D: Association Parameters Negotiated:
D: ====================== BEGIN A-ASSOCIATE-AC =====================
D: Our Implementation Class UID:      1.2.276.0.7230010.3.0.3.6.5
D: Our Implementation Version Name:   OFFIS_DCMTK_365
D: Their Implementation Class UID:    1.2.276.0.7230010.3.0.3.6.4
D: Their Implementation Version Name: OFFIS_DCMTK_364
D: Application Context Name:    1.2.840.10008.3.1.1.1
D: Calling Application Name:    ECHOSCU
D: Called Application Name:     ANY-SCP
D: Responding Application Name: ANY-SCP
D: Our Max PDU Receive Size:    16384
D: Their Max PDU Receive Size:  16384
D: Presentation Contexts:
D:   Context ID:        1 (Accepted)
D:     Abstract Syntax: =VerificationSOPClass
D:     Proposed SCP/SCU Role: Default
D:     Accepted SCP/SCU Role: Default
D:     Accepted Transfer Syntax: =LittleEndianImplicit
D: Requested Extended Negotiation: none
D: Accepted Extended Negotiation:  none
D: Requested User Identity Negotiation: none
D: User Identity Negotiation Response:  none
D: ======================= END A-ASSOCIATE-AC ======================
I: Association Accepted (Max Send PDV: 16372)
I: Sending Echo Request (MsgID 1)
D: DcmDataset::read() TransferSyntax="Little Endian Implicit"
I: Received Echo Response (Success)
I: Releasing Association
Conclusion
This concludes my short tutorial covering Orthanc server which we will utilize for some of the subsequent tutorials in my series of articles on the DICOM standard. If you have any questions or comments regarding this tutorial, please feel free to send me an email. Please note that I may not get back to you right away due to work and other commitments. In my next tutorial in this series, I will dive further into DICOM networking operations. See you then.